Sunday, June 3, 2012

Beer Brewing Fool


Believe it or not, I made my first brew (well, I did with the help of a friend). An American Cream Ale. It looks like beer, it tastes like beer, but who knows how much, if any, alcohol it contains (we missed that part of the beer making procedure). Learning experience- yes. Messy kitchen- absolutely. Does it take longer than originally thought- don't most things?

It takes about a month before it is in the form that one can actually consume. 2 weeks in the carboy (or food grade bucket) and then 2 weeks in the bottles.

Last Saturday was the moment of truth- would it be drinkable beer or something to water the plants with. We were cautiously confident that this would be drinkable beer. Other than following the alcohol measuring procedure (which isn't necessarily that important, say, in comparison to adding the yeast), the procedures were followed. Sanitize, sanitize, sanitize!

Brew Camp was extremely helpful in providing a down and dirty (sanitize, sanitize, sanitize!!) class on home brewing (and they give you a beer sample while you are there- bonus!) They have all the necessary supplies for getting started, including kits, which, for a novice like me, is the best way to get started. There are so many moving parts to brewing that the kit already measured out was helpful.


Again, this is NOT a "I like to keep my kitchen free of stickiness and mess" process. It is messy, especially if you do not have the tap closed on the food grade bucket, oops!! Oh, and regulating the temperature of water is a pain. It sounds easy in theory, but try it. It is a pain in the rear. I knew this from film development, but I clearly forgot how finicky water temp. happens to be.

It is ugly looking, isn't it?!?


After the first process was completed and the future beer was safely in its bucket, one of my cats somehow found the thermometer (a foot long thermometer), which was hidden under all the other contraptions and pots all air drying, and broke it. A casualty of brewing. He was fine just a little shocked at my rushing out of the bedroom to scoop him up away from the shattered glass. It is amazing how certain sounds can wake one from a dead sleep. A tinkling sound is not a normal night sound  (not like the soothing sounds of base coming from the open window of a car missing a muffler that is speeding down your street) and thus I was up immediately. Thanks Dell.

Anyway, 2nd part, the bottling process, went off without too much fan fair, other than properly filling the bottles (something to get the hang of- another mess can ensue), making sure not to suck up the sludge that sits on the bottom of the transferring bucket and being certain that the caps are on well. It is similar to the apprehension of canning- no one wants to offer a friend or family member a contaminated food item. If you do, that person my not like you anymore. Unless you are looking to reduce your circle of friends, properly sealed foodstuffs is a good thing.

So, you might ask, how was it? It was good. Good color, nice taste, a good foam head and those family and friends that have tried it so far are still alive to talk about it.


If you have some free time and are looking to make a mess, I highly recommend brewing up some of your own. It is fun and there is something satisfying about sitting down to a beer that you created. Cheers!


Saturday, June 2, 2012

The beauty that is my mother


Over the weekend my mom and I got together to empty out my storage space- something long over due and because of that, dreaded (the emptying out, not the getting together). Luckily, this is the last of the storage space and what was my married life existence. Donate, dispose, forward on or keep. I guess that is how all things in life go- breaking down memories, souvenirs of our lives. Determining what matters to us then or what we may want in the future- all the while lightening our loads of the things that weigh us down.

My mom is good with this. She always comes willing to lend a hand (and an ear) and doing her best not to invade one's privacy. We usually end up laughing through the task at hand and jumping from topic to topic in a mad whirlwind of jumbled thoughts and tangential stories. She may drive me crazy sometimes, but I appreciate the time we spend and am glad that I have someone like my mother to lean on.

Since retiring, my mother has started to spread her wings- beginning to discover new hobbies. She often claims (falsely, I might add) that she isn't creative or artistic and that these attributes skipped a generation. She is wrong. Like her mother before her, when focused, she is creative and artistic in the things she does. When I was a child, she made costumes for Halloween and tooth fairy pillows for each of my classmates the year all of our teeth seemed to fall out of our heads.


Recently, she attended a clay working class. Her pieces turned out well- even within the newness of the medium, her creativity shows through. She also created a pendant for me, a little tree carving. It is simplistic and beautiful. I admire trees and their quiet strength. I admire the same in my mother. Thanks again mom.

Monday, May 21, 2012

Chicago Italian Ice, Instead of NATO

1068 W Taylor St, Chicago, IL (between Carpenter St & Aberdeen St)


Mario's Italian Ice. Taylor street. This place is a mainstay of Chicago, and Taylor street itself. I have been coming here since I was a teenager-watching the neighborhood shed the Jane Addams Homes (a token building still holds on- there is talk of turning it into a museum...) and don expensive townhouses and trendy restaurants. I found myself there this weekend, rather than in the midst of the NATO summit protests.

Each spring I wait in anticipation for this gem to reopen (they close for the winter), dreaming of the watermelon Italian lemonade (Italian ice) with chucks of watermelon and lemon rinds. The perfect taste of summer and childhood memories. So many memories circle around this place.


I can picture the cars lined up on a hot summer night while my high school friends and I clamor to join the long queue that forms late in the evening. We are all moths trying to make our way to the brightly lighted counter obtaining the nectar, the essence of summer.

I remember heading over there for a treat after Italian mass at The Shrine of Our Lady of Pompeii with Don's (my boyfriend at the time) mother- a lovely Italian momma that took me under her wing to introduce me to all Italian-American- her pastas, foccacias, desserts, Italian language and expectations. She treated me like a daughter throughout, even after her son and I parted ways. I'd go over to her house and together we'd cook and she'd continue teaching me Italian as only a mother can do. She was probably the reason I dated her son for as long as I did.

I remember heading there before the fourth of July fireworks one year when I somehow convinced my family that standing amongst what appeared to be the entire city, and then some, to watch fireworks was a good idea. The line on days like that is thick, but always worth the wait. A calm anticipation keeps order- I don't believe I have ever experienced pushing or shoving even though the three lines are never very clear. It is a place where, while waitng, you can chat with your neighbor who may be from anywhere- people come from far and wide.

If you've never been, you are missing out. Go there, now~ and try a watermelon (or a peach when it is in season). And while you're there, pick up a bag of lupinis. They are a fun addition and an acquired taste, but one worth acquiring.

Here's to summer!

Sunday, May 20, 2012

Pain Perdu (aka French Toast), Asparagus and Orange Butter sauce (Recipe)


Last Sunday, since my family celebrated Mother's Day on Saturday, rather than Sunday (less competition at restaurants), my friend and I had our own non-Mother's day brunch. Along with the mimosas, complements of my friend, we also had French toast (Pain Perdu) with asparagus and a lovely orange beurre blanc sauce with a fresh strawberry salad to cut the heaviness of the French toast dish. All about balance, right!?! I recently have gotten into making normally sweet things, savory. (More to come on that front, promise!)

(This recipe will yield enough for 2, you can double it- no problem!)

Ingredients:

1 bunch of asparagus
olive oil
salt and pepper

Preparation:

Preheat the oven to 475 degrees. Then, wash the asparagus well (tends to have sand in the tips). Place in baking dish and drizzle olive oil and roll the baking dish back and forth to coat same. Add salt (since this was a special occasion, I used my red volcanic salt, but regular salt will do.) and pepper. Bake for 7ish minutes, depending on the size of your asparagus. I prefer it to remain firm, yet cooked. It is easier to cut into pieces later. Once cooked, slice into 1-2 inch pieces and put on the side.

Next, prepare the French Toast mixture.

Ingredients:

2 eggs
1/2 heavy whipping cream
1/2 teaspoon lemon zest
1/4 teaspoon freshly ground nutmeg (optional)
1/4 teaspoon salt (or to preference)
1/4 teaspoon pepper (or to preference)

6 slices of French bread, the good crusty kind, cut into 1 inch slices. (suggestion- cut it the night before and leave it out so that it will be extra absorbent)

Preparation:

In a bowl, whisk together all the ingredients (except the bread), transfer to a bowl that has enough surface area to accommodate your 6 bread slices. Place your bread slices in the mixture for 3 minutes each side to absorb thoroughly. While soaking the bread, preheat the large skillet, and margarine. Make sure the skillet's heat is even before placing your egged bread into it. Cook until each side is nicely browned.

The Sauce:

3/4 cup white wine (I used Sauvignon Blanc)
1/4 cup orange juice (fresh or squeezed- depending on what you have around and if you want to get a little fancier, you can switch the regular orange juice out for blood orange juice- it will be a little more tart)
1 thinly sliced shallot (or again, for a slightly different taste, you can use a small white onion, diced)
1/4 cup heavy whipping cream
1/2 teaspoon of orange or lemon zest
6 tablespoons of butter
salt and pepper to taste
2 tablespoons more of orange juice

Preparation:

In a skillet, bring to a boil wine and juice. Add shallots or onion. Allow to reduce (about 10-15 minutes) until approximately 1-3 tablespoons (don't measure it, just eye it). Whisk in cream and allow to reduce again until approximately 1/8th cup. Reduce heat to low. Add butter, one tablespoon at a time. Once all the butter has been combined, you can either strain the mixture or if you want the added texture of the shallots, you can skip the straining exercise and add the 2 tablespoons of juice and the zest, then salt and pepper to taste.

If you decide to strain the mixture do so into a heat-proof bowl to avoid shattering. Then add zest and remaining juice. Once sauce is complete, you are ready to plate.


(If you decide to include a salad, prepare that beforehand as to not waste time after.) I included just a simple strawberry salad- mixed greens with sliced fresh strawberries and a simple vinaigrette.

Enjoy!

Tuesday, May 15, 2012

Chik'n cutlets and mushrooms in lemon white wine sauce (Recipe)


In continuation of yesterday's meal preparation, here is the recipe for the Quorn Chik'n cutlets and mushrooms in lemon white wine sauce:

Ingredients:
1 package (4 pieces) Quorn naked chik'n cutlets
1 tablespoon butter (or margarine)
2 tablespoons olive oil
1 cup sliced mushrooms
½ cup diced onion
3 cloves diced garlic
1 cup white wine
1 cup vegetable stock
Sprigs of parsley chopped
Salt and pepper to taste
¼ cup lemon juice

Heat skillet. Once the heat is balanced, add your butter and olive oil. Allow butter to melt, then add garlic and onion. Once the onion is translucent add your chicken pieces. Cook until browned. Toss in mushrooms. Mix in the wine and stock; add salt and pepper. Allow to simmer. Add lemon juice. Cook until there is only a small amount of liquid left in the pan.

Place on top of pasta and sprinkle with parsley or prepare potatoes and greens to have along side. This recipe is quite a versatile addition to lots of meal combinations. You could also add this to a nice salad. Endless possibilities!

Monday, May 14, 2012

Kale Pecan Pesto (Recipe)

A couple nights ago I realized I have very little in my refrigerator that easily screams dinner. Throwing aside my go tos, I decided to be creative. The following recipe is what I created...


Kale Pecan Pesto

Ingredients:

1 bunch of roughly chopped curly kale (steamed)
½ cup coarsely chopped pecans
5-7 cloves of garlic
1 large lemon
½ cup white wine
Salt and pepper to taste
½ tsp Chili powder (optional)
½ cup shredded parmesan cheese (or less- up to you)
1 cup olive oil

Preheat oven to 425 degrees. Wrap garlic and pecans in foil and place in oven for approximately 20 minutes.

In a food processor, combine the steamed kale, pecans and garlic, pulse until well blended. Using a spatula, scoop off the sides of the processor to make sure all is well combined. Add parmesan, salt, pepper, chili powder and lemon zest and again pulse until mixed. Again, remove any stray pesto mixture from the sides of the processor. While blending, add lemon juice, white wine, and olive oil. Remember, you can always add, but taking away is not so easy.

Mix in the pesto sauce with your favorite pasta and serve (or you can add a little more to make it an extra filing meal. I added “Chicken” cutlets and mushrooms in lemon white wine sauce to the pasta for some extra protein) Recipe to follow....

Sunday, May 6, 2012

Gnocchi!!!! (Recipe- vegan)


I love gnocchi. The little lead bullets of goodness are the perfect vehicle for any type of sauce. Forever did I think these dumplings were a difficult and mysterious creation from the Italian god of perfection, probably together with Bacchus (because wine shouldn't be left out of a good meal). Anyway, back to my discovery... I decided to try to make these delightful creations, only to find out that they are SUPER easy!!  So, here it goes...

Ingredients:

1 pound Yukon gold potatoes
3/4 cup of flour (or enough flour for the dough not to be sticky)
salt to taste

Process:

Bake the potatoes in the oven until soft- approximately 1 hour or so, depending on their size. Once baked allow to cool.

Remove the skin. In a large bowl, using either a ricer or a fork, mash them up well. Add flour and salt; mix together. Keep adding flour until the dough doesn't feel sticky. Let rest for approximately 5-10 minutes.

During this period of time you can get the water pot started (like you would for any store purchased pasta)

Take a handful of the dough and begin rolling it between your hands to form a log. Then, on a floured cutting board, continue rolling until the dough roll is about the size of your thumb (unless you have really large thumbs, then roll it a little thinner.) Once rolled, cut the dough every inch. Make an imprint in each piece and then roll slightly to create the barrel look. Place on the side (not touching) Do this until all the dough is formed into the individual pieces.

Once the water in your pot is boiling, place your gnocchi into the salted water. Allow to cook until the piece begins to float (approximately 3-4 minutes). Remove from water, place in bowl with favorite sauce and mangia! This recipe feeds about 3-4 people.

Banana Blueberry Bread (Recipe)


Standing in my kitchen reprimanding myself for allowing another two bananas to go uneaten before they became "baking bananas", I noticed the blueberries and I had yet to touch as well. These were still in their prime, but I knew if I ignored them long enough they too would not be saved from the compost pile. Since I am always excited to buy fruits and vegetables, but often neglect them once they arrive in my refrigerator and become just scenery to my exhausted after work or early morning bleary just searching for coffee eye, I felt that what better use then to add the blueberries to the banana bread!

Here's the down and dirty for making the bread:

Ingredients:

2 medium sized well ripened bananas
4 oz softened butter (1 stick)
1 cup sugar
 2 eggs
2 teaspoons vanilla extract or paste
2 teaspoons Amaretto (optional)
2 cups flour
1 1/2 teaspoons baking powder
1 teaspoon baking soda
1/2 teaspoon salt
1 cup of fresh blueberries


Process:

Prepare loaf pan- oil (butter) pan then flour it. Preheat the oven to 350 degrees.

Mix and/or sift together in a medium sized bowl the dry ingredients, except the sugar (flour, baking powder, baking soda and salt). Put aside for the moment.

In a large bowl cream together the sugar and butter. Once well combined, add the banana (you can mash it beforehand or if ripe enough, just throw it in- it will mix up just fine), eggs, Amaretto and vanilla. Mix well- I use a hand mixer, but it isn't necessary, just faster.

Stir the dry ingredients into the banana mixture. Mix until it is combined, but don't over do it. Then fold in the blueberries. Pour batter into prepared pan and place in oven. Cook for approximately 1 hour, or until the center is cooked (toothpick test method).

Let rest for 5 minutes in pan then loosen sides and place on wire rack to cool completely. (or at least as long as you can stand to wait to try it- I usually only last until it is just a little cool. The adage, do as I say, not as I do comes to mind at the moment...)

Enjoy!

Saturday, April 14, 2012

Red Velvet Cupcakes (Recipe)


Ingredients:

Cake:

2 1/2 cups flour
1/2 cup cocoa powder (Droste)
1/2 teaspoon salt
1 teaspoon baking soda
1 cup butter (2 sticks) softened to room temperature
2 cups sugar
4 eggs
1 cup Greek yogurt
1/2 cup milk
1 ounce natural red food coloring
2 teaspoons vanilla extract

Icing:

4 cups of powdered sugar
8 ounces of softened cream cheese
1/4 cup softened butter
2-3 tablespoons of milk, yogurt or sour cream (each will give a slightly different taste to the icing)
2 teaspoons vanilla extract


Directions:

preheat oven to 350 degrees

Mix together sifted flour, cocoa powder, salt and baking soda in a medium sized bowl.

In a separate large bowl, cream (electric mixer works well) together butter and sugar. Add one egg at a time mixing thoroughly. Then add yogurt, vanilla, and milk- continue mixing. Add red food coloring. Slowly mix in the cocoa mixture until just blended together- do not over mix. The batter will be quite thick.

Spoon batter into lined cupcake tins, approximately 2/3 full. Bake for 20 minutes, or until toothpick comes out clean. Cool in tins for 5 or so minutes then transfer cupcakes to wire rack to cool completely.

While cooling, prepare icing.

In a large bowl, beat together until fluffy the cream cheese, butter, milk (or yogurt or sour cream) and vanilla. Then slowly add the powdered sugar until blended and smooth.

Place icing into a piping bag or a sandwich bag and cut tip. Pipe onto the cooled cupcakes.

Store cupcakes in a sealed contact in the refrigerator- cream cheese can and does go bad if left out, even with the addition of the sugar. Better safe... This is presuming that they aren't all immediately consumed, which is a possibility.

Enjoy your lovely cupcakes.

Sunday, April 1, 2012

Polar Plunge (A photo diary) 2012


Saturday, March 31, 2012

Spring Forward (A poem)


Wortels and wombles and mountains of clay
Stretching and shaking the sandman from their eyes
The journey begins again
from slumber they rise
Facing the daylight
Inching higher each day to reach the reality,
which recently was just dream
(J.Smith 2012)

Sunday, February 26, 2012

Ear Candy


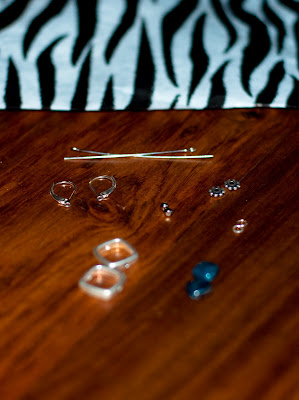
Although I probably had more important things to do today, I placed those must dos to the side and , instead, found a nearby bead store to make a pair of earrings. I have never made a pair of earrings before, but after my success with the necklace I made several months ago, I figured I should give it a try. Also, while at the bead store I found out that they offer free classes to make earrings on the weekends (materials are not included in the "free" part). You can check them out here.


These are more decorative than I normally don, but I wanted something with color and this is what I can up with. I like straight clean lines with most jewelry... and European clasps. I am sure the are probaly called something else, but that is what they were called back when they weren't popular here in the U.S.


I know there are special tools for making jewelry, but I believe in making do with the tools I already have. Why not, right? As you can see it doesn't require much to get started- maybe a design plan and a couple tool. Voila!


And, finally, the finished pieces. I am really happy with them, especially since I have never made earrings before.

Saturday, February 25, 2012

Feathered Mafia


Winter, at least how it parades itself throughout the Midwest, is not my favorite way to experience nature's majesty. However, its exposure revealing the lives normally hidden to us all other times of the year is such a gift. The trees bearing their bony souls share their harmonious parasites, (well, not always harmonious) at least those that remain here to tough it out through the cold spells and grayness of the winter skies, believing in the future of better weather.  

I recognize, against the tempting sun, it is cold and make sure to bundle myself, steel myself against winter’s blustery winds and various forms of chilling precipitation.  The birds, on the other hand, have no such comfort. They can only rely upon the fluff of their feathery undercoat and slick rain coat like layer of beautiful plume to protect them from the same weather I disdain venturing out in. They go about their lives in balanced harmony with nature, something most of us could never and would never attempt to do.

Today, from the comfort of my drafty apartment, I sit and watch a beautiful woodpecker. It, likely unaware of my voyeurism, diligently pecks away at the dormant maple sitting idly across the street awaiting spring.  

A couple days before, while walking the neighborhood, I listened to an encoded communication between several feathered secret agents, chattering along from tree to tree, telephonically. Maybe they were diplomats in conference to determine to whom this territory belongs. From the look of things, I, the outsider, would probably assert with certainty this territory belonged to the pigeons. They seem to lay claim to the local food source guarding it with their sentries against most, although the starlings still receive some rations, be it through trickery or truce.  
The lives of our feathered brethren, their communications, habits and wars usually pass unnoticed beneath the cover of foliage, be it green, yellow, orange or fiery red. Winter, exposes us to the aviary underworld and its glorious complexities. I am looking forward to the time when the sun isn’t lying and it is again pleasant enough to roam comfortably uncovered, but while it lasts I will continue to eavesdrop upon my feathered neighbors listening for the coming of spring.   

Friday, February 17, 2012

A boy and A Little Lost Dog, on a Friday Morning

On my walk to the train this morning I came across a young boy, maybe 10 years old or so. He was looking a bit frantic and speaking very seriously on the phone to someone. As I got closer I noticed an older beagle mix pacing up and down the stairs to an empty house. The poor old dog didn’t seem to know what to do with himself and the boy equally seemed concerned about this little dog.


The boy remained at the foot of the stairs, describing the dog to the absent recipient at the other end of the line while his heavy book bag tugged his coat backward. I waited. Not wanting to intrude on this young boy’s attempt at solving the dog’s issue, I stood off to the side to see how the problem would resolve itself. Finally, the boy, determined to make sure the dog was safe, bravely walked up the stairs to the home and rang the door bell. The dog barked in unison.

After a short delay a middle aged man arrived at the door. The boy took in a breath, screwing up his courage to ask the man about the little dog. “Is this your dog, sir?” the brave boy squeaked out. Confused as to how his dog ended up on the porch, the man responded in bewildered agreement. Yes, this was his dog.

The boy let out a sigh, the dog bounded into the house and we were all back on our way to wherever it was that we were originally headed. The boy to school, I to work, the dog to its bed for a rest from the excitement and the man to whatever it was he was doing before the doorbell interruption.

As the boy bounced down the stairs, he held himself taller, the book bag still slightly slipping off his back. I felt proud of the boy. He understood what was more important- school could wait, there was a being in need and he was ready to help. Many adults miss this helping a fellow in need thing, especially when it walks on all fours. Often we can learn a lot from children- how to recognize the right thing to do, how to show compassion and how to summon the courage to do something good for another.

Friday, January 27, 2012

Pigeon Holed Journey

A while back while waiting for a subway train, I watched a pigeon peck around here and there. He (since all pigeons are “he”s, at least to me anyway. And, yes I realize there is a slight flaw in my logic), bumbled around and, flustered by the oncoming train, even fluttered about the platform without any real purpose.


He looked casual as most pigeons do. Casual in the sense of “I am not looking at you,” “I am not looking at you,” but as soon as the coast seems to be clear here I come to rush the crumb of whatever it is that you just dropped. It has to be a tasty morsel! …or…a pebble you say? No matter, I was just casually passing by. I experience this behavior time and time again while having lunch near a small fountain surrounded by steps and various types of birds- none of them quite as casual as the pigeon.

Once the train settled into an indefinite stop, normal for a train hub, the pigeon settled itself back down on the platform. Still roaming looking for a handout, he began hopping in and out of the opened door of the waiting train car. I watched from a distance, this game of chicken he was playing, tempting the doors to close.

When the doors finally did, he, the pigeon was on board. I wonder what thoughts went through his head as the large metal doors slid shut with him on the wrong side of them. Where was he headed?

Maybe this was his plan all along. Him screwing up the courage to take that step, playfully almost so as not to bring on the anxiety of knowing full well that this was going to be a life changer, a journey of a lifetime. I wanted to be on that train, to be an observer of his wondrous train ride, but instead I was left in time on the platform, the pigeon’s train moving into an unknown future.

Am I just personifying my fellow pigeon? (A cardinal(?) sin when observing wildlife- even the life of a pigeon). Or was it a projection of my own dreams- getting on that train and taking the first step toward something new? This is possible as well. I cannot imagine what wondrous things the pigeon experienced, but as the train pulled away, I felt elation, a ray of hope that maybe I too can take that playful leap.

Monday, January 2, 2012

Gnawing at the Walls- Gingerbread House (recipe)


Continuing my immersion into all things gingerbread, I made my very first gingerbread house. Just like any other house (I would imagine) it takes proper measurements, planning, patience and lots and lots of mortar, or in this case, icing.

Be prepared. Have a serrated knife, a form or a really good eye for measurements and some free time. You can be as creative as your mind, budget and supplies allow. Since I have access to a couple candy stores, I was in good company.

Have all your basics ready to go (e.g. your base for the house, your royal icing, your gingerbread dough, and things to brace your house while building and allowing the icing to dry). If you are ready, it will be less frustrating and your roof will more likely than not remain attached.

What you will need (mind you, this IS an art project, my suggestions are just that, suggestions).

1) Board for the house. I went to my local craft store and found a foam poster board that I cut in half and covered with aluminum wrap. This way, I can use it again once this one has been consumed.

2) Royal Icing:

Ingredients:

3 tablespoons meringue powder (you can find it at your craft store or specialty food store)
4 cups powdered sugar
6 tablespoons warm water
piping bag(s) or plastic sandwich bags with a sealing device (e.g Ziploc)
food coloring for coloring icing

Preparation:

In a large bowl combine all ingredients and beat using a handheld mixer until the icing forms peaks. approximately 10 minutes.

DO NOT LEAVE UNCOVERED ONCE READY. It is your mortar, it will solidify and become useless if you leave it out. Put it into your uncut piping bag and seal it or place it into a airtight container.

Gingerbread Dough Preparation- dough can be made the day before:

Ingredients:

6 cups flour
1/2 teaspoon baking powder
1 teaspoon baking soda
1 cup butter (unsalted), softened
1 cup brown sugar
4 teaspoons ground ginger
4 teaspoons cinnamon
1 1/2 teaspoons ground cloves
1 teaspoon black pepper
1 1/2 teaspoons salt
1 1/2 dark unsulfured molasses
2 eggs

Preparation:

Sift together the flour, baking soda and powder in a bowl, something large enough to hold 6 cups of flour. (the "Dry Ingredients")

In a separate large bowl, combine the butter and brown sugar. Once well creamed, add all the spices (including the salt and pepper). Beat in the eggs and molasses. (the "Wet Ingredients")

Slowly add the Dry Ingredients to the Wet Ingredients. Mix until well combined.

Break the dough up into approximately 1/3s, wrap each separately in plastic wrap pressing it flat and round (for easier rolling later) and refrigerate for at least 1 hour (or overnight).

When the dough (and you) are ready, preheat the oven to 350 degrees Fahrenheit.

Only take out the 1/3 you are planning on working with. That way the other pieces stay solid. Roll out the dough on a well flour dusted space. Have your forms ready to go. If the dough is sticky, put it back in the refrigerator.

Roll the dough out to approximately 1/4 thickness. Place your forms on the dough and carefully cut out your shapes. Use a sharp knife- it just cuts cleanly. Cut your windows and doors out at this point. Be as creative as you want. Place each cut out on your parchment covered cookie sheets. Chill on the cookie sheets for 10 minutes or so, if you can. Not necessary, just helpful.

If you want to get fancy, you can crush up hard candies and place them in your window openings to get the stained glass affect. Any color will do. I used suckers, but any hard candy will do.  This is great if you are planning on lighting your house (or adding the battery operated candles)


Bake for approximately 15 minutes, or until firm.

Remove from cookie sheet, once slightly cool enough to touch, use your cutting board and serrated knife to clean up the edges. Saw at the pieces gently, you don't want to break it into pieces. It will make it significantly easier to build your house with clean lines. Then place on cooling rack and allow to completely cool.


It will take a couple rounds of cutting and baking to make your entire house.

Construction of your edible home:

Have your icing ready, cut a SMALL hole in the piping bag. Small is better. Place your decorating board on a flat surface and have all of your home pieces ready to go in the same location, along with supporting props (e.g. cups, books, jars, whatever will help hold the walls straight while the icing is drying.

Generously ice the bottom of your first wall. Place it firmly on the board. Then along the base of the board and the first piece, pipe more icing. Have your supporting prop next to the first side for this.

Next, ice the bottom and corresponding side of the second piece of the house to form a 90 degree angle. Press the second piece firmly, yet gently to adhere to your first piece. again, have your prop ready.

Keep adding your sides like this. Wait until your walls are fully secured and dried before you add the roof. You don't want it to collapse after all that hard work. It will take between 4 to 8 hours depending on the humidity to become secure enough to add the roof.


Once dry, you can begin decorating the roof of the house and its surrounding area. I wanted a wintery scene so I added some further decorations.


Candies and such used:

ice cream cone (tree)
white chocolate covered malted balls,
hard candies, blue for creek
vegan marshmallows, snow bank
graham cracker sticks for wood pile
candy covered chocolate rocks for walkway
yogurt covered pretzel stars and balls for house decoration
marzipan for dog and cat
cinnamon toast crunch cereal for the thatched roof
shredded coconut for snow

to add the snow and make it stick, you can thin out some of the icing by placing a teaspoon of icing in a small container and adding water until it is quite thin. Then, with a basting brush, paint with the icing where you want the "snow" to be.


It is a great project and lots of fun. Some great sites where I found some ideas, tips, recipes, and most important forms, are found here, and here, and here and here.